Installing a subwoofer in your car can dramatically improve the quality of your audio system, delivering deep bass that enhances the overall listening experience.
Whether you’re a seasoned audiophile or a DIY beginner, this guide will walk you through the process, from choosing the right equipment to the final installation steps.
Installation Steps
Step 1: Mounting the Subwoofer
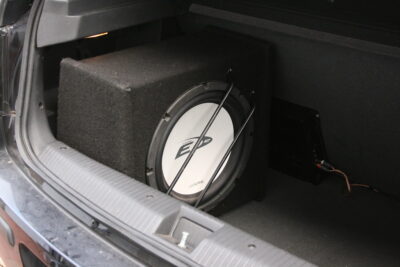
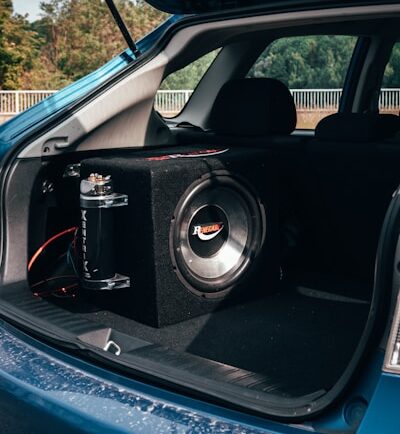
- Choose the Right Location: The trunk is usually the best spot for your subwoofer due to its ample space and ability to minimize sound interference with your car’s existing audio system. However, if space is a concern, consider under-seat locations for smaller subwoofers.
- Secure the Subwoofer: Once you’ve decided on a location, you need to securely mount the subwoofer. Use screws and brackets (often provided with the subwoofer) to firmly attach it to your car’s frame or a sturdy surface. Make sure it’s tightly mounted to prevent any vibrations or movement while driving.
Step 2: Wiring the Subwoofer to the Amplifier
- Gather Your Tools and Materials: You’ll need a wiring kit that includes power, ground, and audio signal cables, as well as a few tools like wire strippers, screwdrivers, and possibly a drill.
- Connect Power Cable to Battery: Run a power cable from the positive terminal of your car’s battery to the location of your amplifier. Be sure to fuse this cable near the battery to protect your car from electrical fires.
- Ground Your System: Connect a ground cable from the negative terminal on your amplifier to a clean, metal point on your car’s chassis. This should be as short as possible and make direct contact with the vehicle’s metal frame.
- Run the RCA Cables: Connect RCA cables from your car stereo’s output to the amplifier. This will likely require running the cables from the dashboard through to where you’ve installed the amp.
- Connect Speaker Wires: Run speaker wires from the amplifier to your subwoofer. Ensure that you match the positive and negative terminals correctly to avoid any phase issues.
- For detailed wiring diagrams, refer to resources like the Rockford Fosgate Wiring Wizard or your equipment’s installation manuals.
Step 3: Connecting to the Car’s Audio System
- Integration with Existing Audio: Depending on your car’s make and model, you might need additional adapters to connect your amplifier to the factory stereo. In some cases, a line output converter (LOC) may be necessary to convert speaker-level outputs to RCA (line-level).
- Secure Connections: Ensure all connections are secure and properly insulated to prevent any electrical shorts.
Step 4: Final Adjustments for Optimal Sound
- Adjusting the Amplifier: Start with your amplifier’s gain set to low, and slowly increase it until you achieve the desired sound quality. Be careful not to set the gain too high as it can lead to distortion.
- Tuning the Subwoofer: Play with the crossover settings on your amplifier to ensure that your subwoofer is only playing frequencies that are too low for your car’s regular speakers to handle efficiently.
- Listening Test: Play a variety of music and adjust the settings until you’re happy with the sound. It might take a few tries to get it right, so be patient.
Before diving into the installation process, it’s crucial to gather all necessary tools and components. You’ll need:
- A subwoofer
- An amplifier (unless you’re installing a powered subwoofer, which has an integrated amp)
- Wiring kit for connecting the subwoofer and amplifier
- A set of basic tools (screwdrivers, wire strippers, etc.)
Safety Tip: Always disconnect your car’s battery before starting any installation to prevent electric shock or damage to your vehicle’s electrical system.

Planning Your Subwoofer Installation
Planning a subwoofer installation in your vehicle is a critical step that ensures the enhancement of your audio system goes smoothly and results in the best possible sound.
This process involves several key considerations, from choosing the right equipment to understanding the acoustics of your vehicle. Let’s dive into what goes into planning a subwoofer installation.
1. Determining Your Audio Goals
- Sound Quality vs. Loudness: Decide whether you’re aiming for crisp, clear bass that accurately reproduces the sound as intended by the artist or if you’re looking for window-rattling loudness. Your goal will significantly influence the type of subwoofer and amplifier you’ll need.
- Music Preferences: Different genres of music can benefit from different types of subwoofer setups. For example, classical and jazz music may require a more refined bass response, while hip-hop and EDM might benefit from larger, more powerful subs.
2. Choosing the Right Subwoofer
- Size Matters: Subwoofers generally range from 8 inches to 15 inches. Larger subwoofers can move more air, resulting in louder bass, but they require more power and space. Smaller subs are more compact and can fit in tighter spaces but may not offer the same level of bass output.
- Powered vs. Passive Subwoofers: Powered subwoofers have a built-in amplifier and are easier to install, making them a good choice for beginners or for vehicles with limited space. Passive subwoofers require an external amplifier but offer more flexibility in customizing your sound system.
Find Your Perfect Subwoofer
Select your preferred music style:
3. Selecting an Amplifier
- Matching the Subwoofer: Ensure the amplifier’s power output matches the subwoofer’s power handling capabilities. Too little power can be just as harmful as too much, leading to a subpar audio experience or even damage to the subwoofer.
- Consider the Impedance: The impedance (measured in ohms) of your subwoofer and amplifier must be compatible. Incorrect impedance can lead to inefficient performance or damage to your audio components.
4. Considering the Enclosure Type
- Sealed Enclosures: Offer the most accurate and tight bass response. Best for listeners who prefer sound quality over sheer volume.
- Ported Enclosures: Provide more volume and are efficient, making them suitable for genres that benefit from loud, booming bass.
- Bandpass and Passive Radiator Designs: These are more complex and can offer unique advantages in certain setups, but they require more careful planning and design.
5. Vehicle Acoustics and Space
- Acoustic Properties: Every vehicle has unique acoustic characteristics. Sound-deadening materials can help reduce rattles and improve sound quality.
- Space Availability: Determine where in your vehicle the subwoofer will fit. Common locations include the trunk, under seats, or in custom enclosures that can take up part of your cargo area.


Tips for Better Sound
- Positioning: Experiment with the subwoofer’s position in the trunk to find the best sound. Sometimes, facing the subwoofer towards the back or sides of the car can enhance bass response.
- Cabling: Use high-quality cables for connections to reduce signal loss and interference.
- Isolation: Consider adding sound-damping materials to the trunk to reduce rattles and improve sound quality.
Subwoofer Installation Safety Tips
- Always disconnect the battery before starting the installation.
- Wear protective gloves when handling sharp objects or when drilling into the car’s body.
- Ensure all wires are securely insulated and routed away from moving parts or heat sources.
Protecting Your Subwoofer
- Install a grill over your subwoofer to protect it from damage.
- Regularly check the mounting and wiring for any signs of wear or loosening.
How to Install a Powered Subwoofer
Installing a powered subwoofer in your car is a great way to enhance your audio system with deeper bass without the complexity of separate amplifiers and subwoofers.
A powered subwoofer combines both the amplifier and subwoofer into a single unit, making it an ideal choice for adding bass in vehicles with limited space or for those seeking a simpler installation process.
Here’s how to do it in steps, including advice on choosing mounting locations and how the process differs from installing a standard amplifier and subwoofer setup.


Step 1: Choosing a Mounting Location
- Under the Seat: Ideal for smaller vehicles, placing the subwoofer under a seat can save space and still deliver a significant bass impact. Ensure there’s enough clearance for ventilation.
- In the Trunk: For larger powered subwoofers, the trunk remains a popular choice. It offers more space and can accommodate bigger units for deeper bass.
- Rear Cargo Area: In SUVs or hatchbacks, the rear cargo area can be a good compromise, offering space without sacrificing all of your cargo room.
Differences from Standard Setups
Unlike traditional setups where you might mount the amplifier on the car’s body and the subwoofer in a box, a powered subwoofer combines these components, requiring only one mounting spot. This simplifies the process and is less invasive for your vehicle’s interior.
Step 2: Wiring the Powered Subwoofer
- Disconnect the Battery: Always start by disconnecting the negative terminal of your battery to prevent any electrical issues.
- Power Cable: Run a power cable from the positive terminal of your battery to the location of your powered subwoofer. Include an inline fuse near the battery for safety.
- Ground Cable: Secure a ground cable from the subwoofer to a clean, bare metal point on your vehicle’s chassis.
- Signal Wires: Connect the audio signal cables. If your car stereo has preamp outputs, use RCA cables. Otherwise, you may need a speaker-level input adapter to connect the subwoofer directly to your car’s existing speaker wires.
- Remote Turn-On Wire: This wire activates the subwoofer when the car stereo is turned on. Connect it to the stereo’s remote turn-on lead or use a fuse tap to connect it to a fuse that powers on with the ignition.
Step 3: Finalizing the Installation
- Secure the Subwoofer: Ensure the powered subwoofer is firmly mounted in its location. Use brackets or Velcro strips if you’re placing it under a seat to prevent movement.
- Reconnect the Battery: Once all connections are secure and checked, reconnect the negative terminal of your battery.
- Adjusting Settings: Turn on your car stereo and adjust the subwoofer settings according to your preferences. Start with the gain or volume low and gradually increase it to avoid distortion.
- Tuning: Play around with crossover frequencies to ensure your subwoofer handles only low frequencies, and adjust the phase and gain settings to blend the bass smoothly with your car’s existing speakers.
What is Needed to Install a Subwoofer
The basic requirements for installing a subwoofer in a car include the subwoofer itself, an amplifier (for non-powered subwoofers), a wiring kit, and a set of tools for the installation process.


Wiring Kit Components
| Component | Description |
|---|---|
| Power cable | Connects the amplifier to the car’s battery for power. |
| Ground cable | Provides a ground connection for the amplifier. |
| Audio signal cables (RCA) | Carry the audio signal from the car stereo to the amplifier. |
| Speaker wires | Connect the amplifier to the subwoofer. |
Step 1: Select Your Woofer Quantity
Step 2: Choose Your Woofer Impedance
Frequently Asked Questions
- How hard is it to install a subwoofer in a car?
- The difficulty varies based on the complexity of your car’s audio system and the type of subwoofer. Powered subwoofers are generally easier to install than component systems.
- Can I install a subwoofer without an amplifier?
- For most non-powered subwoofers, an external amplifier is necessary to provide sufficient power. However, powered subwoofers have built-in amplifiers.
- How do I wire a subwoofer to an amp?
- Wiring involves connecting the power, ground, and audio signal cables from the amp to the subwoofer, following the manufacturer’s instructions or diagrams like the Rockford Fosgate Wiring Wizard.

