HOW TO WET SAND CAR PAINT
Wet sanding is one of my favorite things to do to a vehicle before detailing.
Ill teach you how to wet sand car paint in steps that are used in a professional shop. Once you start to understand paint and clear coat and the way you can manipulate them after them after the painting process is done you can start to learn what tools, compounds, waxes and sand paper to use.
Starting off one of the things you need to do is to consider what type of outcome you would like from your wet sand treatment.
Would you like to retain the orange peel the factory paint naturally has? or would you like to have more of a flat glass look? Is the clear coat texture a bit off in some locations that do not match the original paint? The outcome you would like will dictate some of the tools you will be using as well as the way in which you will be using them, choose wisely!
How to wet sand car paint: What do I Need to Wet Sand Clear Coat?
The first thing you will need to invest in is a quality dual action Polisher and orbital sander, assuming you are looking to buff out the wet sand marks after you are done sanding. you’ll need a few more things to make these tools actually work:
- 1500 Grit sand paper
- 3000 grit sand paper
- 3 stage 3m pad set with 3 stage compound
- Cleaning spur (to clean compound and dirt from pads)
Orbital sanders are typically used after the initial wet sanding is done on either a scratch in your paint or dirt in your clear coat. You will use different grit sand paper depending upon the out come you would like. Sand paper grit is a reference to the harshness or roughness of the sand paper, the higher the grit number the less harsh it is.
How to Wet Sand Car Paint:
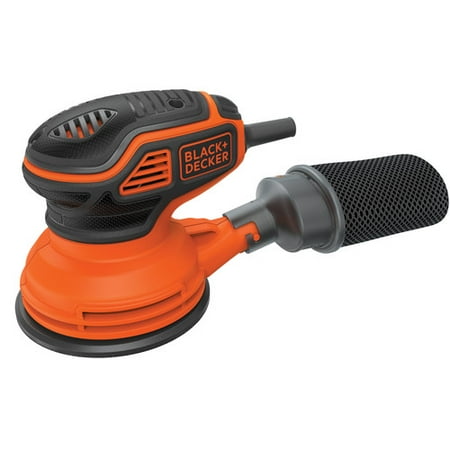
Orbital sander:
Amazon affiliate here: If you click any Amazon links on my pages and purchase any products I get a small commission from within the original price. Thank you!
Whether you are using sand paper on a Orbital sander or using it manually by hand rubbing you will get vastly different responses from your sand paper depending upon the grit number.
A more harsh grit sand paper like 1000 will cut through the clear coat at a more rapid rate than 2000. Keep this in mind when ordering sand paper and when using it.
Your main goal when wet sanding car paint is to take dirt, craters and scratches out of the clear coat. You don’t want to completely remove the clear coat from the paint, which is why you must use a less aggressive grit sand paper to achieve your goal.
How to Wet Sand Car Paint:
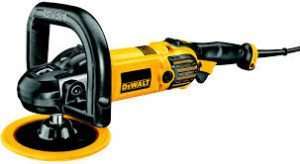
Dual Action Polisher


After you finish wet sanding you will need to polish out your sand scratches. The easiest way to do this is with a Polisher, and boy is it fun!
A dual action polisher is generally used in 2 or 3 stages, these stages are determined by the pad you have connected onto them. Each pad cuts or polishes paint differently, but its pretty simple.
Think of it in stages. Stage 1 is the wool pad, stage 2 is the black pad, and finally stage 3 is the blue pad that shines your paint to perfection.
How to Wet Sand Car Paint:
Compound


Compound is a solution that is used to cut and polish the clear coat. You rub the compound into the pad you have attached to the Dual action polisher and then spin it onto the clear coat.
Different types of compound’s are used for different stages of the cutting and buffing process. Each one of them have a different grade of mineral content in them that aid the pad in doing its job.
My favorite thing about compound is that depending on the brand it will match the color of the pad you will use it with. I use the Dewalt Dual action Polisher along with 3M brand pads and compounds that match in color.
The white wool pad goes the white stage one compound and so forth.
How to Wet Sand car paint – Wet sanding in steps
Now that you understand what tools you’ll need and why you’ll need them we can discuss wet sanding techniques.
It is important that you know the results you are trying to achieve with wet sanding before you start, this “How to guide” is for scratch, crater and dirt removal from clear coat. Now lets start:
Step 1:
How to wet sand car paint – How to Wet Sanding Preparation
Start off by taping off and corners that can be damaged from the sand paper such as corners and plastic molding, decals and door handles.
While sanding and polishing you can “burn” (cut beyond clear coat) edges and corners with the pad and or sand paper without even noticing it.
Step 2:
How to wet sand car paint – Cleaning
One very important part of wet sanding is finding dirt and craters in clear coat.
If you have a bunch of dirt on the surface of your clear coat it makes it so much harder to notice paint defects.
I recommend you use a spray bottle of water to spray the surface you intend on cutting with sandpaper before you start cutting.
after you spray you should wipe it down thoroughly with a microfiber cloth after in order to clean dirt from the surface of your paint.
step 3:
How to wet sand car paint – Locating paint defects and cutting them
After you’ve prepped the area for sanding it is time to start locating the dirt in the clear coat or the scratches you would like to remove.
You can do this by using you hands and slowly rubbing your hands over the paint slowly feeling for any bumps and irregularities in the paint. You must also look while you rub.
When you find the paint defect start to sand it down with your sand paper. Make sure you are using a spray bottle with water or liquid spray wax to keep the area and your sand paper wet while you are sanding.
Remember to wipe the area after every 5 sanding strokes, this allows you to see what progress you’ve made.
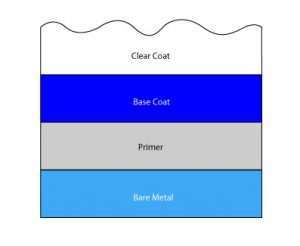
Make sure not to sand to deeply, you could take away the natural “Orange peel” texture of the paint (most of the time this isn’t avoidable anyway). Or worse, you could sand through a layer clear coat which is called “Burning”.
You can generally tell the look of a burn by if dullness and offset color. A burn reveals that you have sanded through the only layer of clear coat on the paint or one of the layers of clear coat on the paint:
Once you have sanded the dirt in the clear coat away and or any other clear coat defects manually with your sand paper sheet of 1000-1500 grit you can begin to use the orbital sander to start and eliminate the marks the sand paper just made.
Step 4
How To Wet Sand Car Paint – How to Wet Sand With an Orbital Sander
Your Orbital Sander requires a different type of sand paper. In fact its not necessarily called sand paper, it’s actually called a sanding disk.
Your sanding disk will be either a 3 inch or 6 inch, I personally prefer the 6 inch sander with a 6 inch disk.
Make sure your sanding disk is mounted flat and evenly onto the sander. If you do not mount it evenly you risk scuffing the paint and nobody likes scuffed paint!
Now its time to sand. Sanding with the Orbital sander is similar to the way you would sand free hand except you need to watch out for the edges of the painted surfaces a lot more.
Once you turn on the orbital sander it takes a second for it to stop! Make sure you are using water and a sanding pad with the proper grit level.
I usually free hand sand with 1500 grit and then use my orbital with a 3000 grit sanding pad to go over it. You generally want to free hand with a more coarse grit and then use a more soft and fine grit on the orbital.
Step 5:
How to Wet Sand Car Paint – How To Buff out sand paper scratches With A Polisher
After you have sanded out your dirt or your scratch with 1500 grit sand paper and have used 3000 grit sand paper disks on your orbital you now need to begin cutting with your pad on the Polisher!
There are three steps to achieving this.
Your first step is to use your “white foam or wool first stage cutting pad” (Assuming you purchased the tools i recommended earlier).
The white wool pad is used to take out the initial scratches you created with the 3000 grit sanding disk earlier.
Use the recommended compound from the list above (White Stage 1 Compound) on this wool pad by pouring a small amount on your pad to prep the wool, work a small amount of it into the fibers of the wool so that it wont generate too much heat when you first start buffing.
After the 3000 grit area is fully buffed out, grab a clean microfiber and wipe the area clan to inspect the dirt or the scratch in the clear coat.
If the scratch or dirt inst out you might need to wet sand with 15000 grit a bit more. If the scratch or the dirt is gone you can move to your next step!
Your second step is to use your “Black foam second stage polishing pad” (Assuming you purchased the tools I recommended earlier).
The black foam pad is used to polish out the swirls that your white wool pad leaves behind.
Start by using your black polishing stage 2 compound on your foam pad, saturate it with a few drops of the compound and rub the pad to spread the compound out.
Next, pour a small mount over the area and start your buffer slow (600 RPM) and as the compound spreads up your spread to about 1200 RPM.
After you have buffed out the area, clean it off with a clean microfiber towel. If the swirls from the white pad are Know longer there your all done and ready to move onto the final step!
Your third step is to use your “Blue foam third stage finishing pad” (Assuming you Purchased the tools I recommended earlier).
The Blue foam pad is the last step, this step isn’t always needed but i recommend it. Use your blue finishing stage three compound The blue pad is generally used on dark colored cars like black, blue, red.
To properly use the blue pad you prime it exactly the way you did the black pad, however I find that the blue compound spreads easiest and a little bit faster so make sure you don’t use that much of the compound. (It flings around a lot more).


